 srcmini
本文概述
- Windows
- Linux
- 苹果系统
- Windows
- Linux
- 苹果系统
- Python缩进
- 变量
- 操作符
- 接受用户的输入–
- 将输出打印到控制台–
- 数字
- 序列类型
- boolean
- Set
- 字典
- 循环控制语句
- 带参数的功能
- Lambda函数
- 类和对象
- 构造函数和析构函数
- 遗产
- 封装形式
- 多态性
- 模组
- 配套
Python是一种高级编程语言, 在开发人员社区中得到广泛使用。 Python主要是为了强调代码的可读性而开发的, 其语法允许程序员用更少的代码行来表达概念。 Python是一种编程语言, 可让开发人员快速工作并更有效地集成系统。
该Python 3教程为学习者(无论是初学者还是经验丰富的开发人员)提供从Python基础到高级主题的示例。
主题:
- 关键功能和应用
- 下载并安装
- 如何运行Python程序
- Python基础
- 缩进
- 注释
- 变量
- 操作符
- 输入/输出基础
- 资料类型
- 数字
- String
- list
- tuple
- boolean
- Set
- 字典
- 做决定
- 控制流(循环)
- While和while-else循环
- For和for-else循环
- range()函数
- 循环控制语句
- 打破
- 继续
- 通过
- 函数
- 带参数的功能
- Lambda函数
- OOPS概念
- 类和对象
- 构造函数和析构函数
- 遗产
- 封装形式
- 多态性
- 文件处理
- 模块和包装
- 常用表达
- 异常处理
主要特征
python有很多原因受到欢迎和需求。以下是一些原因。
- 强调代码可读性强, 代码简短, 易于编写.
- 程序员可以在其中表达逻辑概念更少的代码行与C ++或Java之类的语言相比。
- python支持多种编程范例, 例如面向对象, 命令式和函数式编程或过程。
- 它提供广泛的支持库(Django用于Web开发, Pandas用于数据分析等)
- 动态类型语言(数据类型基于分配的值)
- 哲学是”简单是最好的”。
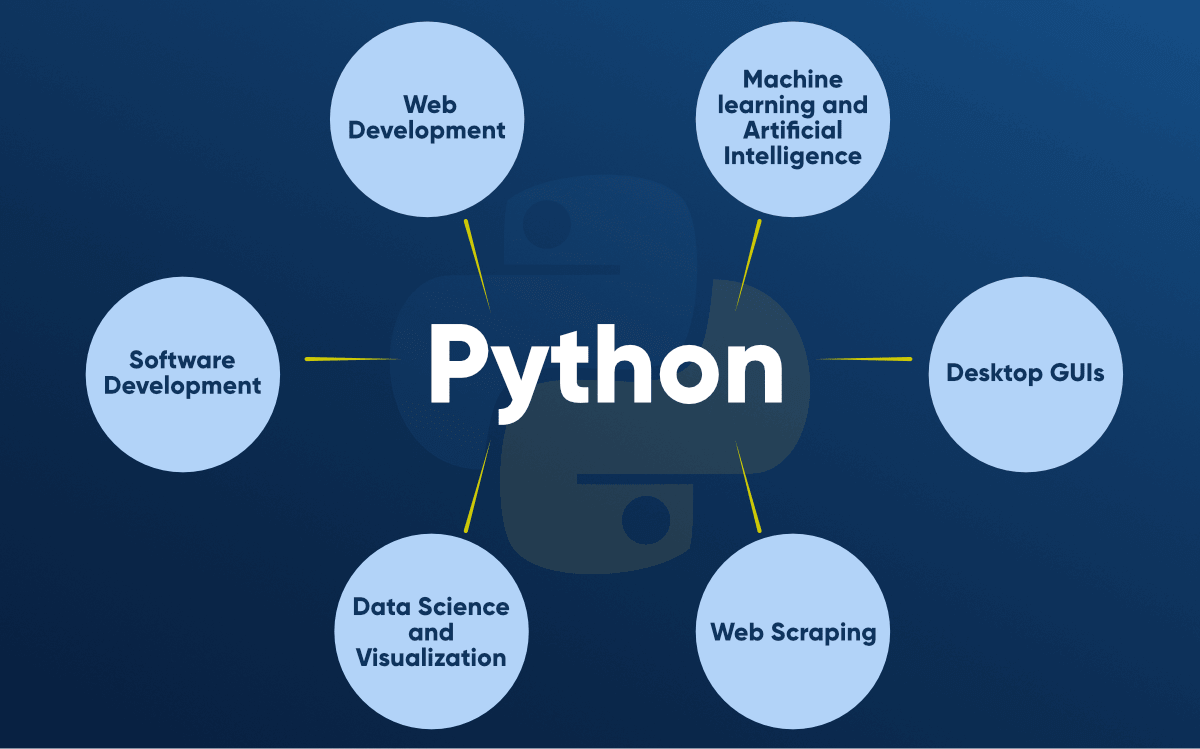
应用领域
Python入门
Python更容易编码和学习。 Python程序可以在任何纯文本编辑器(如记事本, notepad ++或此类工具)上编写。一个人也可以使用
在线IDE, 用于编写Python代码
甚至可以在其系统上安装一个以使编写这些代码更可行, 因为IDE提供了许多功能, 例如直观的代码编辑器, 调试器, 编译器等。
首先, 编写Python代码并执行各种有趣且有用的操作, 必须在系统上安装Python。可以按照下面提供的分步说明进行操作:
如果Python已经存在怎么办?让我们检查
Windows未预装Python, 因此需要明确安装。但是与Windows不同的是, 大多数Linux操作系统已预安装Python, macOS也预装有Python。
要检查你的设备是否预装了Python, 只需转到
命令行
(对于
Windows
, 搜索
指令
在运行对话框中(
+
[R
),
Linux
使用打开终端
Ctrl + Alt + T
, 对于
苹果系统
采用
Ctrl + Option + Shift + T
.
现在运行以下命令:
对于Python2
python --version对于Python3
python3 --version如果已经安装了Python, 它将生成一条消息, 其中包含可用的Python版本。

下载及安装
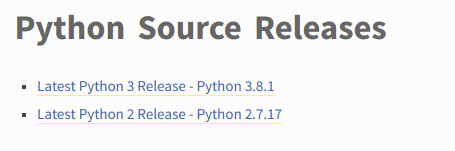
在开始安装过程之前, 你需要下载它。为此, 可在以下位置使用适用于Windows, Linux和MacOS的所有版本的Python:python.org.
Windows
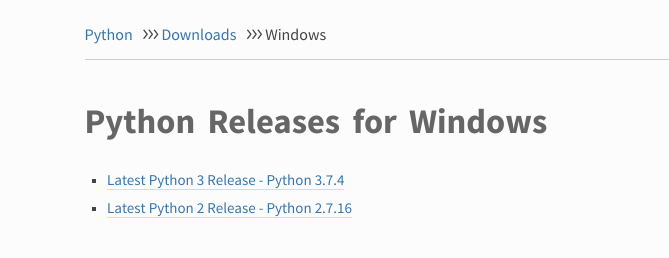
Linux
苹果系统
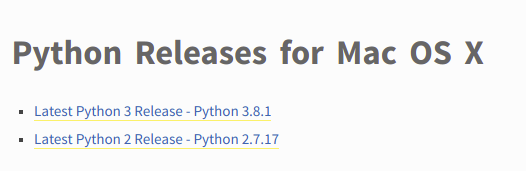
下载Python, 并按照进一步的说明安装Python。
开始安装。
Windows
从以下位置运行Python安装程序
资料下载
夹。确保标记”将Python 3.7添加到PATH”, 否则你将必须明确地执行此操作。
它将开始在Windows上安装python。
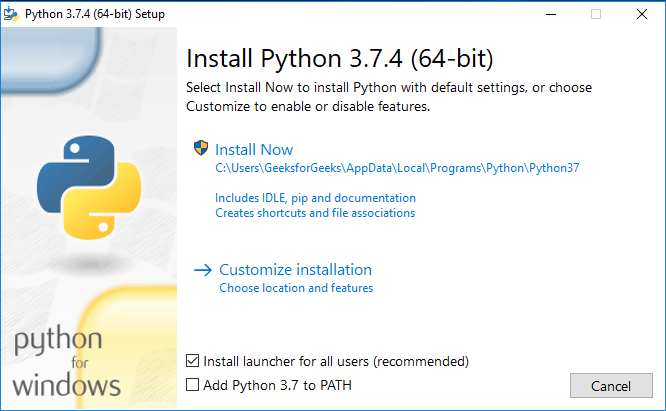
安装完成后, 单击”关闭”。
答对了..!! Python已安装。现在转到Windows并输入IDLE。
Linux
对于几乎每个Linux系统, 以下命令都可以正常使用。
$ sudo add-apt-repository ppa:deadsnakes/ppa
$ sudo apt-get update
$ sudo apt-get install python3.8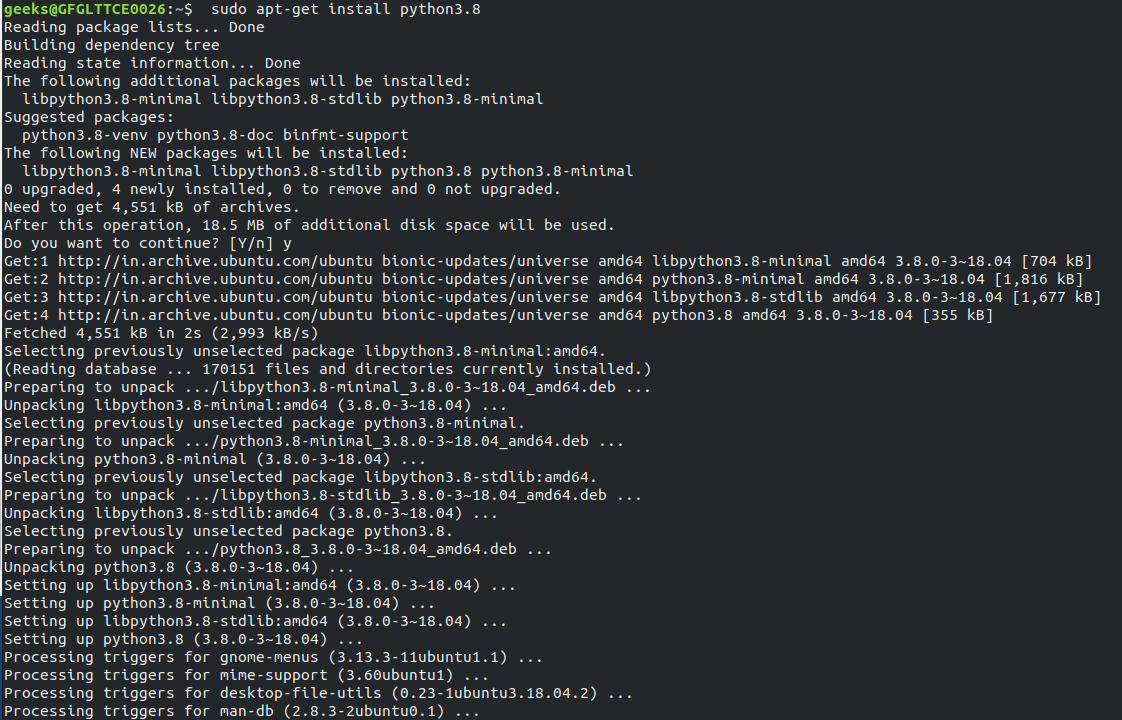
要验证安装, 请在终端中输入以下命令。
python3
苹果系统
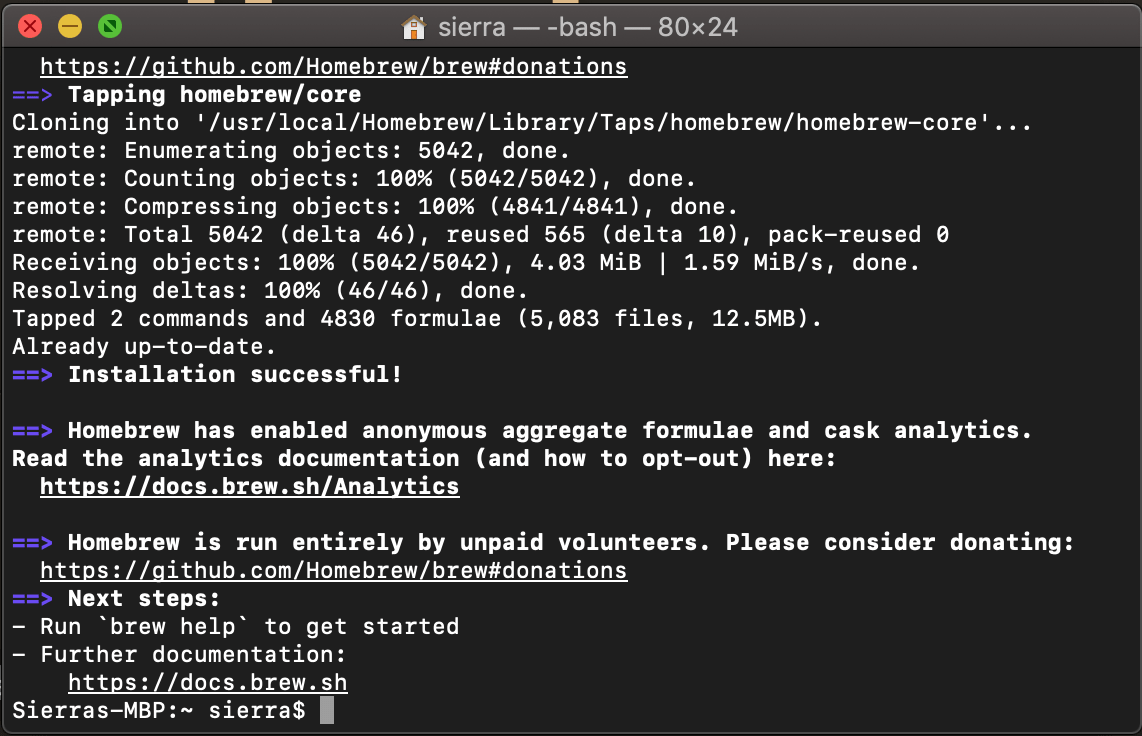
下载并安装Homebrew软件包管理器
在macOS终端中输入以下命令。
/usr/bin/ruby -e "$(curl -fsSL https://raw.githubusercontent.com/Homebrew/install/master/install)"
如果出现提示, 请输入系统密码。这将在你的OS上安装Homebrew软件包管理器。
你看到一条消息, 即”安装成功”。你已准备好在macOS上安装python版本3。
在macOS/macOS X上安装Python最新版本
打开终端, 然后输入以下命令。
brew install python3命令处理完成后, Python的版本3将安装在你的Mac上。
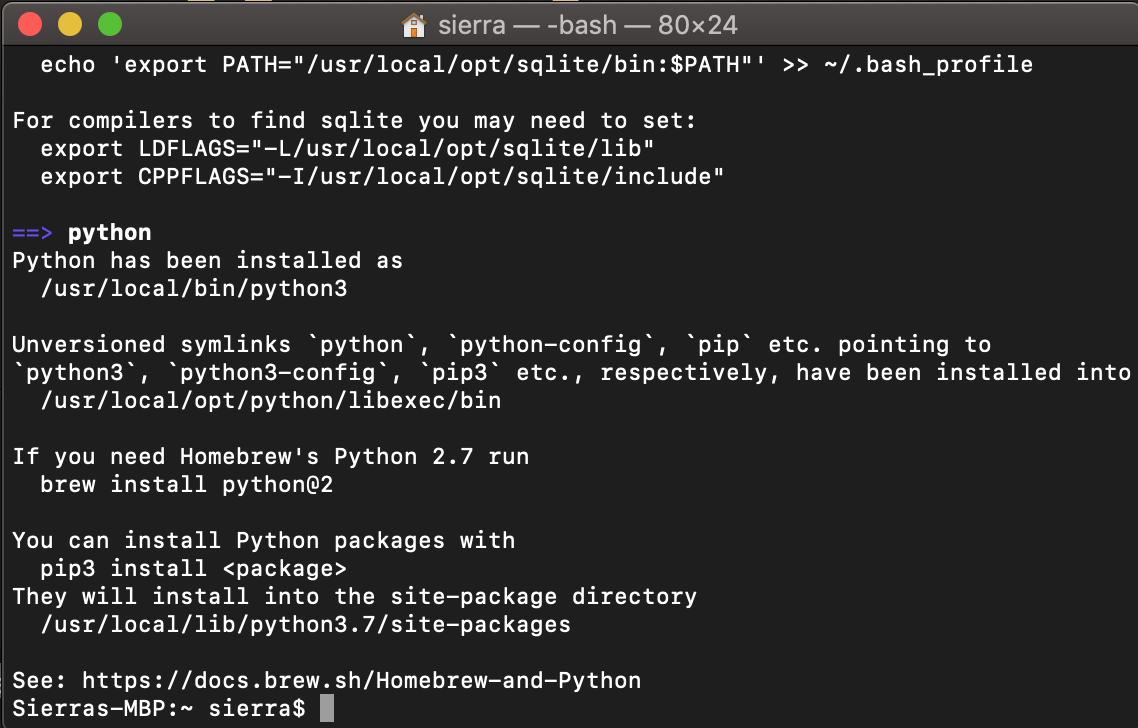
要验证安装, 请在终端应用程序中输入以下命令
pythona fa-hand-o-rightpip3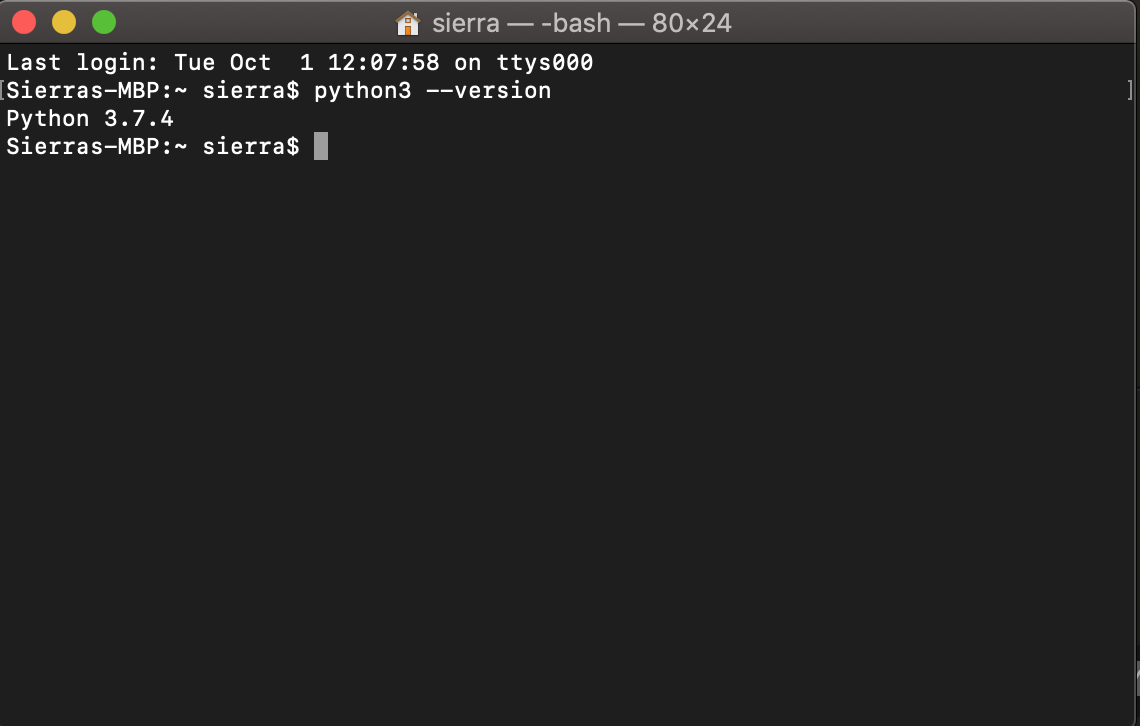
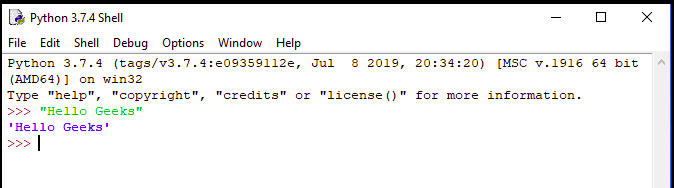
如何运行Python程序
让我们考虑一个简单的Hello World程序。
# Python program to print
# Hello World

print("Hello World")
通常, 有两种方法可以运行Python程序。
- 使用IDE:你可以使用各种IDE(Pycharm, Jupyter Notebook等)来运行Python程序。
- 使用命令行:你还可以使用命令行选项来运行Python程序。以下步骤演示了如何在Windows / Unix操作系统中的命令行上运行Python程序:
Windows
打开命令行, 然后编译代码类型python HelloWorld.py。如果你的代码没有错误, 则它将正确执行并显示输出。

Unix / Linux
打开Unix/Linux操作系统的终端, 然后编译代码类型python HelloWorld.py。如果你的代码没有错误, 则它将正确执行并显示输出。

Python缩进
Python使用缩进突出显示代码块。空格用于缩进在Python中。所有距离右边相同距离的语句都属于同一代码块。如果必须更深地嵌套一个块, 则只需向右缩进即可。通过查看以下代码行, 你可以更好地理解它。
# Python program showing
# indentation

site = 'gfg'

if site == 'gfg':
    print('Logging on to srcmini...')
else:
    print('retype the URL.')
print('All set !')
输出如下:
Logging on to srcmini...
All set !
线打印(“登录srcmini …”)和打印(“重新输入URL。”)是两个单独的代码块。我们的示例if语句中的两个代码块都缩进了四个空格。决赛打印(“全部设置!”)不缩进, 因此它不属于else块。
注意:有关更多信息, 请参阅??Python中的缩进.
注释是开发人员提供的有用信息, 以使读者理解源代码。它解释了代码中使用的逻辑或逻辑的一部分。 Python有两种类型的注释:
- 单行注释:Python单行注释以无空格的井号标签符号开头。
# This is a comment # Print "srcmini !" to console print("srcmini") - 多行字符串作为注释:Python多行注释是注释两端的定界符(“””)内的一段文本。
"""
This would be a multiline comment in Python that
spans several lines and describes srcmini.
A Computer Science portal for geeks. It contains
well written, well thought
and well-explained computer science
and programming articles, quizzes and more.
…
"""
print("srcmini")
注意:有关更多信息, 请参阅??Python注释.
变量
变量在Python中不是”静态类型”。我们不需要在使用变量之前声明变量或声明变量的类型。我们首先为变量分配值时即会创建一个变量。
#!/usr/bin/python

# An integer assignment
age = 45

# A floating point
salary = 1456.8

# A string
name = "John"

print(age)
print(salary)
print(name)
输出如下:
45
1456.8
John
注意:有关更多信息, 请参阅??Python变量.
操作符
操作符是任何编程语言的主要组成部分。运算符允许程序员对操作数执行不同种类的运算。可以根据它们的不同功能对这些运算符进行分类:
算术运算符
:算术运算符用于执行数学运算, 例如加法, 减法, 乘法和除法。
# Examples of Arithmetic Operator
a = 9
b = 4

# Addition of numbers
add = a + b
# Subtraction of numbers
sub = a - b
# Multiplication of number
mul = a * b
# Division(float) of number
div1 = a /b
# Division(floor) of number
div2 = a //b
# Modulo of both number
mod = a % b

# print results
print(add)
print(sub)
print(mul)
print(div1)
print(div2)
print(mod)
输出如下:
13
5
36
2.25
2
1
关系运算符:
关系运算符比较这些值。根据条件返回True或False。
# Examples of Relational Operators
a = 13
b = 33

# a> b is False
print(a> b)

# a <b is True
print(a <b)

# a == b is False
print(a == b)

# a != b is True
print(a != b)

# a>= b is False
print(a>= b)

# a <= b is True
print(a <= b)
输出如下:
False
True
False
True
False
True
逻辑运算符:
逻辑运算符执行逻辑与, 逻辑或和逻辑非运算。
# Examples of Logical Operator
a = True
b = False

# Print a and b is False
print(a and b)

# Print a or b is True
print(a or b)

# Print not a is False
print(not a)
输出如下:
False
True
False
按位运算符:
按位运算符作用于位并执行逐位操作。
# Examples of Bitwise operators
a = 10
b = 4

# Print bitwise AND operation
print(a & b)

# Print bitwise OR operation
print(a | b)

# Print bitwise NOT operation
print(~a)

# print bitwise XOR operation
print(a ^ b)

# print bitwise right shift operation
print(a>> 2)

# print bitwise left shift operation
print(a <<2)
输出如下:
0
14
-11
14
2
40
分配运算符:
赋值运算符用于为变量赋值。
特殊操作员:
特殊运算符有两种类型-
- 包含的身份运算符is和不是.
- 包含的会员运算符in和不在.
# Examples of Identity and
# Membership operator


a1 = 'srcmini'
b1 = 'srcmini'

# Identity operator
print(a1 is not b1)
print(a1 is b1)

# Membership operator
print("G" in a1)
print("N" not in b1)
输出如下:
False
True
True
True
注意:有关更多信息, 请参阅??Python中的基本运算符.
接受用户的输入–
Python为我们提供了两个内置函数, 可从键盘读取输入。
- raw_input():此函数在较旧的版本中有效(例如Python 2.x)。此函数完全使用键盘输入的内容, 将其转换为字符串, 然后将其返回给我们要存储的变量。例如:
# Python program showing # a use of raw_input() g = raw_input("Enter your name : ") print g - 输入():此函数首先从用户处获取输入, 然后对表达式求值, 这意味着Python自动识别用户输入的是字符串还是数字或列表。例如:
# Python program showing
# a use of input()

val = input("Enter your value: ")
print(val)
注意:有关更多信息, 请参阅??python输入()和raw_input().
将输出打印到控制台–
产生输出的最简单方法是使用打印()该函数可以传递零个或多个用逗号分隔的表达式。此函数在写入屏幕之前将你传递的表达式转换为字符串。
# Python 3.x program showing
# how to print data on
# a screen

# One object is passed
print("srcmini")

x = 5
# Two objects are passed
print("x =", x)

# code for disabling the softspace feature
print('G', 'F', 'G', sep ='')

# using end argument
print("Python", end = '@')
print("srcmini")
输出如下:
srcmini
x = 5
GFG
Python@srcmini
资料类型是数据项的分类或分类。它表示一种值, 该值告诉可以对特定数据执行哪些操作。由于在Python编程中一切都是对象, 因此数据类型实际上是类, 而变量是这些类的实例(对象)。
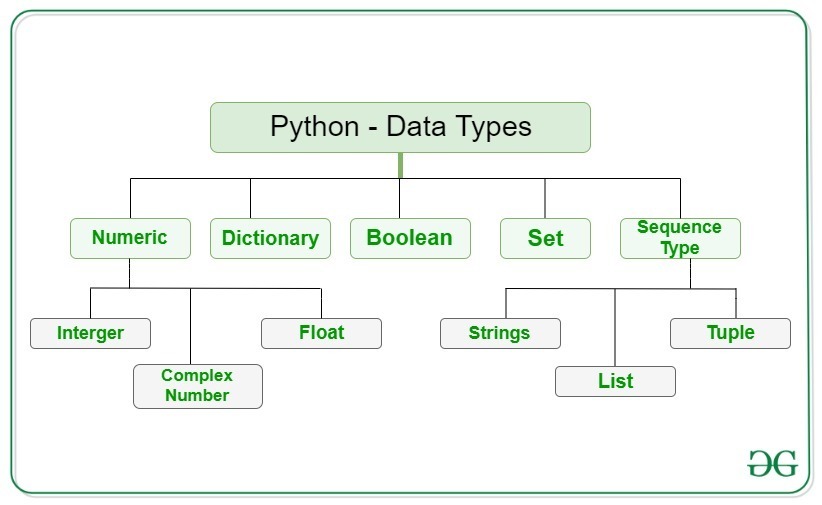
数字
在Python中, 数字数据类型表示具有数字值的数据。数值可以是整数, 浮点数甚至是复数。这些值定义为int, float和复杂Python中的类。
# Python program to
# demonstrate numeric value

print("Type of a: ", type(5))

print("\nType of b: ", type(5.0))

c = 2 + 4j
print("\nType of c: ", type(c))
输出如下:
Type of a:  <class 'int'>

Type of b:  <class 'float'>

Type of c:  <class 'complex'>
序列类型
在Python中, 序列是相似或不同数据类型的有序集合。序列允许以有组织的有效方式存储多个值。 Python中有几种序列类型–
- String
- list
- tuple
1)字符串:字符串是用单引号, 双引号或三引号括起来的一个或多个字符的集合。在python中, 没有字符数据类型, 字符是长度为一的字符串。它由str类。 Python中的字符串可以使用单引号, 双引号甚至三引号来创建。
# Python Program for
# Creation of String

# String with single quotes
print('Welcome to the Geeks World')

# String with double quotes
print("I'm a Geek")

# String with triple quotes
print('''I'm a Geek and I live in a world of "Geeks"''')
输出如下:
Welcome to the Geeks World
I'm a Geek
I'm a Geek and I live in a world of "Geeks"
访问字符串元素–

# Python Program to Access
# characters of String

String1 = "srcmini"

# Printing First character
print(String1[0])

# Printing Last character
print(String1[-1])
输出如下:
G
s
从字符串删除/更新–
在Python中, 由于字符串是不可变的, 因此不允许从字符串中更新或删除字符。只能将新字符串重新分配给相同的名称。
# Python Program to Update /delete
# character of a String

String1 = "Hello, I'm a Geek"

# Updating a character
String1[2] = 'p'

# Deleting a character
del String1[2]
输出如下:
Traceback (most recent call last):
File "/home/360bb1830c83a918fc78aa8979195653.py", line 6, in
String1[2] = ‘p’
TypeError: ‘str’ object does not support item assignment

Traceback (most recent call last):
File "/home/499e96a61e19944e7e45b7a6e1276742.py", line 8, in
del String1[2]
TypeError: ‘str’ object doesn’t support item deletion
注意:有关更多信息, 请参阅??Python字符串.
请参阅以下文章以了解有关字符串的更多信息:Python中的字符串切片Python Python字符串串联Python字符串插值关于String的Python编程问题
2)清单: 清单就像用其他语言声明的数组一样。单个列表可能包含数据类型, 例如整数, 字符串以及对象。根据确定的序列对列表中的元素进行索引, 并使用0作为第一个索引来完成列表的索引。它由list类。
# Python program to demonstrate
# Creation of List

# Creating a List
List = []
print(List)

# Creating a list of strings
List = ['srcmini', 'Geeks']
print(List)

# Creating a Multi-Dimensional List
List = [['Geeks', 'For'], ['Geeks']]
print(List)
输出如下:
[]
['srcmini', 'Geeks']
[['Geeks', 'For'], ['Geeks']]
将元素添加到列表中:使用附加(), 插入()和延伸()
# Python program to demonstrate
# Addition of elements in a List

# Creating a List
List = []

# Using append()
List.append(1)
List.append(2)
print(List)

# Using insert()
List.insert(3, 12)
List.insert(0, 'Geeks')
print(List)

# Using extend()
List.extend([8, 'Geeks', 'Always'])
print(List)
输出如下:
[1, 2]
['Geeks', 1, 2, 12]
['Geeks', 1, 2, 12, 8, 'Geeks', 'Always']
从列表访问元素–
使用索引运算符[]访问列表中的项目。在Python中, 负序索引表示从数组末尾开始的位置。不必像这样计算偏移量列表[len(List)-3], 只写就足够了清单[-3].
# Python program to demonstrate
# accessing of element from list


List = [1, 2, 3, 4, 5, 6]

# accessing a element
print(List[0])
print(List[2])

# Negative indexing
# print the last element of list
print(List[-1])
# print the third last element of list
print(List[-3])
输出如下:
1
3
6
4
从列表中删除元素:使用去掉()和pop()
# Python program to demonstrate
# Removal of elements in a List

# Creating a List
List = [1, 2, 3, 4, 5, 6, 7, 8, 9, 10, 11, 12]

# using Remove() method
List.remove(5)
List.remove(6)
print(List)

# using pop()
List.pop()
print(List)
输出如下:
[1, 2, 3, 4, 7, 8, 9, 10, 11, 12]
[1, 2, 3, 4, 7, 8, 9, 10, 11]
注意:有关更多信息, 请参阅??Python清单.
请参阅以下文章以了解有关列表的更多信息:遍历Python中的列表Python列表理解和对列表上的Python编程问题进行切片
3)元组: tuple是Python对象的有序集合, 非常类似于列表。列表和元组之间的重要区别在于元组是不可变的。它由tuple类。在Python中, 元组是通过放置由”逗号”分隔的值序列(使用或不使用括号将数据序列分组)来创建的。
# Python program to demonstrate
# creation of Set

# Creating an empty tuple
Tuple1 = ()
print (Tuple1)

# Creating a tuple of strings
print(('Geeks', 'For'))

# Creating a Tuple of list
print(tuple([1, 2, 4, 5, 6]))

# Creating a nested Tuple
Tuple1 = (0, 1, 2, 3)
Tuple2 = ('python', 'geek')
Tuple3 = (Tuple1, Tuple2)
print(Tuple3)
输出如下:
()
('Geeks', 'For')
(1, 2, 4, 5, 6)
((0, 1, 2, 3), ('python', 'geek'))
访问元组的元素–
使用索引运算符[]访问元组中的项目。
# Python program to
# demonstrate accessing tuple

tuple1 = tuple([1, 2, 3, 4, 5])

# Accessing element using indexing
print(tuple1[0])

# Accessing element using Negative
# Indexing
print(tuple1[-1])
输出如下:
1
5
删除/更新元组的元素–
元组的项目不能删除, 因为元组在Python中是不可变的。只能将新的元组重新分配给相同的名称。
# Python program to
# demonstrate updation /deletion
# from a tuple

tuple1 = tuple([1, 2, 3, 4, 5])

# Updating an element
tuple1[0] = -1

# Deleting an element
del tuple1[2]
输出如下:
Traceback (most recent call last):
  File "/home/084519a8889e9b0103b874bbbb93e1fb.py", line 11, in
    tuple1[0] = -1
TypeError: 'tuple' object does not support item assignment

Traceback (most recent call last):
  File "/home/ffb3f8be85dd393bde5d0483ff191343.py", line 12, in
    del tuple1[2]
TypeError: 'tuple' object doesn't support item deletion
注意:有关更多信息, 请参阅??Python元组.
请参阅以下文章, 以了解有关元组的更多信息:在元组的Python操作中解压缩元组在元组上的Python编程问题
boolean
布尔值是具有两个内置值之一的数据类型, trueorfalse。它由类bool表示。
# Python program to
# demonstrate boolean type

print(type(True))
print(1>2)
print('a'=='a')
输出如下:
<class 'bool'>
False
True
Set
在Python中, Set是可迭代, 可变且没有重复元素的无序数据类型集合。尽管集合中的元素顺序可能由各种元素组成, 但未定义。可以使用内置创建集组()通过将序列放在花括号内, 可迭代对象或序列可以使用{}, 以”逗号”分隔。
# Python program to demonstrate
# Creation of Set in Python

# Creating a Set
set1 = set()

# Creating a Set of String
set1 = set("srcmini")
print(set1)

# Creating a Set of List
set1 = set(["Geeks", "For", "Geeks"])
print(set1)
输出如下:
{'o', 'r', 'k', 'G', 'e', 's', 'F'}
{'Geeks', 'For'}
添加元素:使用加()和update()
# Python program to demonstrate
# Addition of elements in a Set


set1 = set()

# Adding to the Set using add()
set1.add(8)
set1.add((6, 7))
print(set1)

# Additio to the Set using Update()
set1.update([10, 11])
print(set1)
输出如下:
{8, (6, 7)}
{8, 10, 11, (6, 7)}
访问集合:可以使用对于循环, 因为无法通过引用索引访问设置的项目。
# Python program to demonstrate
# Accessing of elements in a set

# Creating a set
set1 = set(["Geeks", "For", "Geeks"])

# Accessing using for loop
for i in set1:
    print(i, end =" ")
输出如下:
Geeks For从集合中删除元素:使用去掉(), 丢弃(), pop()和明确()
# Python program to demonstrate
# Deletion of elements in a Set

set1 = set([1, 2, 3, 4, 5, 6, 7, 8, 9, 10, 11, 12])

# using Remove() method
set1.remove(5)
set1.remove(6)
print(set1)

# using Discard() method
set1.discard(8)
set1.discard(9)
print(set1)

# Set using the pop() method
set1.pop()
print(set1)

# Set using clear() method
set1.clear()
print(set1)
输出如下:
{1, 2, 3, 4, 7, 8, 9, 10, 11, 12}
{1, 2, 3, 4, 7, 10, 11, 12}
{2, 3, 4, 7, 10, 11, 12}
set()
注意:有关更多信息, 请参阅??Python集.
请参阅以下文章, 以了解有关集合的更多信息:在Python上的Python Frozenset()中迭代集合上有关集合的Python编程问题
字典
字典在Python中, 是数据值的无序集合, 用于存储数据值(如地图)。词典持有核心价值对。字典中的每个键值对均以冒号分隔:, 而每个键均以”逗号”分隔。可以通过将一系列元素放置在卷曲中来创建字典{}大括号, 以”逗号”分隔。
# Creating an empty Dictionary
Dict = {}
print(Dict)

# with Integer Keys
Dict = {1: 'Geeks', 2: 'For', 3: 'Geeks'}
print(Dict)

# with Mixed keys
Dict = {'Name': 'Geeks', 1: [1, 2, 3, 4]}
print(Dict)
输出如下:
{}
{1: 'Geeks', 2: 'For', 3: 'Geeks'}
{1: [1, 2, 3, 4], 'Name': 'Geeks'}
嵌套字典:
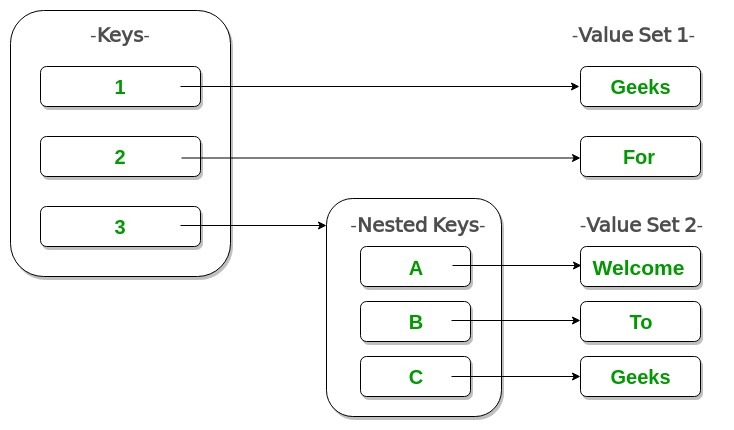
# Creating a Nested Dictionary
# as shown in the below image
Dict = {1: 'Geeks', 2: 'For', 3:{'A' : 'Welcome', 'B' : 'To', 'C' : 'Geeks'}}

print(Dict)
输出如下:
{1: 'Geeks', 2: 'For', 3: {'A': 'Welcome', 'B': 'To', 'C': 'Geeks'}}注意:有关更多信息, 请参阅??Python嵌套字典.
在字典中添加元素:通过将值与键(例如)一起定义, 可以一次将一个值添加到字典中。Dict [Key] =’Value’.
# Creating an empty Dictionary
Dict = {}

# Adding elements one at a time
Dict[0] = 'Geeks'
Dict[2] = 'For'
Dict[3] = 1
print(Dict)


# Updating existing Key's Value
Dict[2] = 'Welcome'
print(Dict)
输出如下:
{0: 'Geeks', 2: 'For', 3: 1}
{0: 'Geeks', 2: 'Welcome', 3: 1}
从字典访问元素:为了访问字典的项目, 请参考其键名或使用得到()方法。
# Python program to demonstrate
# accessing an element from a Dictionary

# Creating a Dictionary
Dict = {1: 'Geeks', 'name': 'For', 3: 'Geeks'}

# accessing a element using key
print(Dict['name'])

# accessing a element using get()
print(Dict.get(3))
输出如下:
For
Geeks
从字典中删除元素:使用pop()和popitem()
# Initial Dictionary
Dict = { 5 : 'Welcome', 6 : 'To', 7 : 'Geeks', 'A' : {1 : 'Geeks', 2 : 'For', 3 : 'Geeks'}, }

# using pop()
Dict.pop(5)
print(Dict)

# using popitem()
Dict.popitem()
print(Dict)
输出如下:
{'A': {1: 'Geeks', 2: 'For', 3: 'Geeks'}, 6: 'To', 7: 'Geeks'}
{6: 'To', 7: 'Geeks'}
注意:有关更多信息, 请参阅??Python字典.
请参阅以下文章以了解有关字典的更多信息:字典操作对Python中的字典进行迭代对字典的Python编程问题
编程中的决策类似于现实生活中的决策。编程语言使用控制语句根据某些条件来控制程序的执行流程。这些用于根据程序状态的更改使执行流程前进并分支。
Python中的决策声明
- 如果声明
- if..else语句
- 嵌套if语句
- if-elif梯子
示例1:展示if和如果别的
# Python program to demonstrate
# decision making

a = 10
b = 15

# if to check even number
if a % 2 == 0:
    print("Even Number")

# if-else to check even or odd
if b % 2 == 0:
    print("Even Number")
else:
    print("Odd Number")
输出如下:
Even Number
Odd Number
示例2:展示嵌套如果和if-elif
# Python program to demonstrate
# decision making

a = 10

# Nested if to check whether a
# number is divisible by both 2 and 5
if a % 2 == 0:
    if a % 5 == 0:
        print("Number is divisible by both 2 and 5")

# is-elif
if (a == 11):
    print ("a is 11")
elif (a == 10):
    print ("a is 10")
else:
    print ("a is not present")
输出如下:
Number is divisible by both 2 and 5
a is 10
注意:有关更多信息, 请参阅??Python决策.
循环当我们需要重复执行一个语句块时, 在编程中就可以使用。例如:假设我们要打印10次” Hello World”。这可以借助循环来完成。 Python中的循环是:
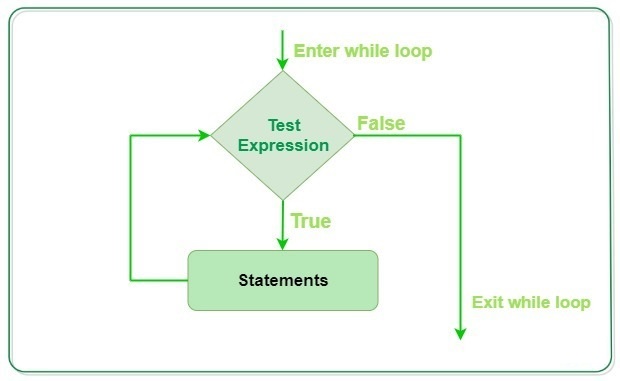
While和while-else循环
# Python program to illustrate
# while and while-else loop
i = 0
while (i <3):
    i = i + 1
    print("Hello Geek")

# checks if list still
# contains any element
a = [1, 2, 3, 4]
while a:
    print(a.pop())

i = 10
while i <12:
    i += 1
    print(i)
    break
else: # Not executed as there is a break
    print("No Break")
输出如下:
Hello Geek
Hello Geek
Hello Geek
4
3
2
1
11
注意:有关更多信息, 请参阅??Python While循环.
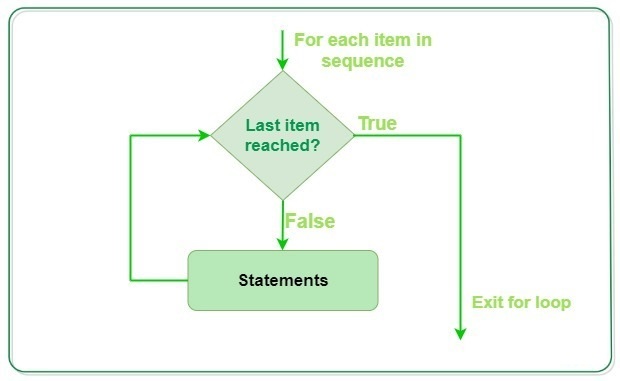
For和for-else循环
# Python program to illustrate
# Iterating over a list
print("List Iteration")
l = ["geeks", "for", "geeks"]
for i in l:
    print(i)

# Iterating over a String
print("\nString Iteration")
s = "Geeks"
for i in s :
    print(i)

print("\nFor-else loop")
for i in s:
    print(i)
else: # Executed because no break in for
    print("No Break\n")

for i in s:
    print(i)
    break
else: # Not executed as there is a break
    print("No Break")
输出如下:
List Iteration
geeks
for
geeks

String Iteration
G
e
e
k
s

For-else loop
G
e
e
k
s
No Break

G
注意:有关更多信息, 请参阅??Python的循环.
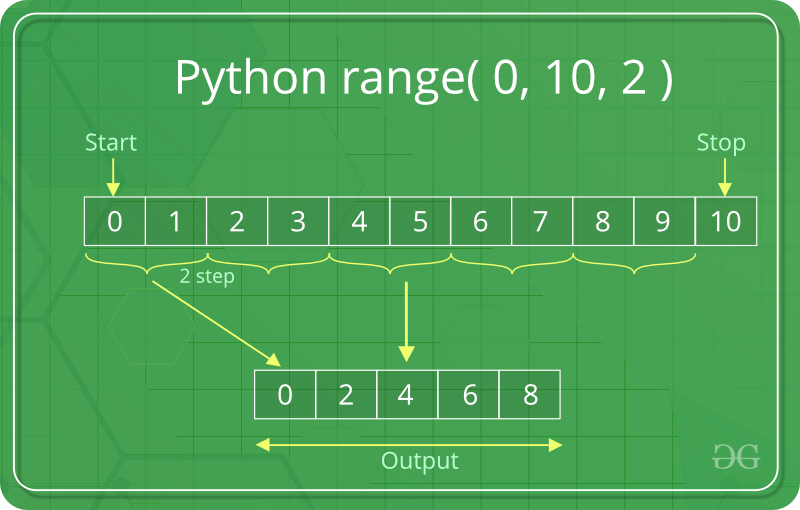
range()函数:
范围()
允许用户在给定范围内生成一系列数字。取决于用户传递给函数的参数数量。此函数接受三个参数。
1)开始:
整数, 从该整数开始返回整数序列
2)停止:
整数, 在该整数之前要返回整数序列。
3)步骤:
整数值, 确定序列中每个整数之间的增量
filter_none
# Python program to demonstrate
# range() function


for i in range(5):
    print(i, end =" ")
print()

for i in range(2, 9):
    print(i, end =" ")
print()

# incremented by 3
for i in range(15, 25, 3):
    print(i, end =" ")
输出如下:
0 1 2 3 4
2 3 4 5 6 7 8
15 18 21 24
注意:有关更多信息, 请参阅??Python range()函数.
请参阅以下文章, 以了解有关循环的更多信息:了解Python中的for循环Python中的向后迭代
循环控制语句
循环控制语句从正常顺序更改执行。以下是Python提供的循环控制语句:
- 打破:Python中的Break语句用于在触发某些外部条件时将控件带出循环。
- 继续:Continue语句与break语句相反, 它不是终止循环, 而是强制执行循环的下一个迭代。
- 通过:Pass语句用于编写空循环。 Pass还用于空的控制语句, 函数和类。
# Python program to demonstrate
# break, continue and pass

s = 'srcmini'

for letter in s:
    if letter == 'e' or letter == 's':
        break
    print(letter, end = " ")
print()

for letter in s:
    if letter == 'e' or letter == 's':
        continue
    print(letter, end = " ")
print()

for letter in s:
    if letter == 'e' or letter == 's':
        pass
    print(letter, end = " ")
输出如下:
g
g k f o r g k
g e e k s f o r g e e k s
注意:有关更多信息, 请参阅??中断, 继续并通过Python.
函数通常是程序中的代码或语句块, 使用户能够重用相同的代码, 从而最终节省了过多的内存使用, 节省了时间, 更重要的是, 提供了更好的代码可读性。因此, 基本上, 函数是语句的集合, 这些语句执行某些特定的任务并将结果返回给调用方。函数也可以执行某些特定任务而无需返回任何内容。在Python中, 定义关键字用于创建函数。
# Python program to demonstrate
# functions


# Defining functions
def ask_user():
    print("Hello Geeks")

# Function that returns sum
# of first 10 numbers
def my_func():
    a = 0
    for i in range(1, 11):
        a = a + i
    return a

# Calling functions
ask_user()
res = my_func()
print(res)
输出如下:
Hello Geeks
55
带参数的功能
默认参数:
默认参数是一个参数, 如果在函数调用中未提供该参数的值, 则该参数将采用默认值。
# Python program to demonstrate
# default arguments


def myFun(x, y = 50):
    print("x: ", x)
    print("y: ", y)

# Driver code
myFun(10)
输出如下:
('x: ', 10)
('y: ', 50)
关键字参数:
这个想法是允许调用者使用值指定参数名称, 以便调用者无需记住参数的顺序。
# Python program to demonstrate Keyword Arguments
def student(firstname, lastname):
     print(firstname, lastname)


# Keyword arguments
student(firstname ='Geeks', lastname ='Practice')
student(lastname ='Practice', firstname ='Geeks')
输出如下:
('Geeks', 'Practice')
('Geeks', 'Practice')
可变长度参数:
在Python中, 函数也可以具有可变数量的参数。当我们事先不知道将传递给函数的参数数量时, 可以使用此方法。
# Python program to demonstrate
# variable length arguments


# variable arguments
def myFun1(*argv):
    for arg in argv:
        print(arg, end =" ")

# variable keyword arguments
def myFun2(**kwargs):
    for key, value in kwargs.items():
        print ("% s == % s" %(key, value))

# Driver code
myFun1('Hello', 'Welcome', 'to', 'srcmini')
print()
myFun2(first ='Geeks', mid ='for', last ='Geeks')
输出如下:
Hello Welcome to srcmini
first == Geeks
last == Geeks
mid == for
注意:有关更多信息, 请参阅??Python中的函数.
请参阅以下文章, 以了解有关函数的更多信息:Python内部函数Python return语句从另一个函数调用函数
Lambda函数
在Python中, lambda /匿名函数表示函数没有名称。的拉姆达关键字用于创建匿名函数。 Lambda函数可以具有任意数量的参数, 但只有一个表达式。
# Python code to demonstrate
# labmda function

# Cube using lambda
cube = lambda x: x * x*x
print(cube(7))

# List comprehension using lambda
a = [(lambda x: x * 2)(x) for x in range(5)]
print(a)
输出如下:
343
[0, 2, 4, 6, 8]
注意:有关更多信息, 请参阅??Python lambda(匿名函数).
请参阅以下文章, 以了解有关Lambda的更多信息:Lambda上的Python编程问题
面向对象的编程旨在在编程中实现诸如继承, 隐藏, 多态等现实世界的实体。 OOP的主要目的是将数据和对其进行操作的功能绑定在一起, 以便除该功能外, 代码的其他任何部分都无法访问此数据。
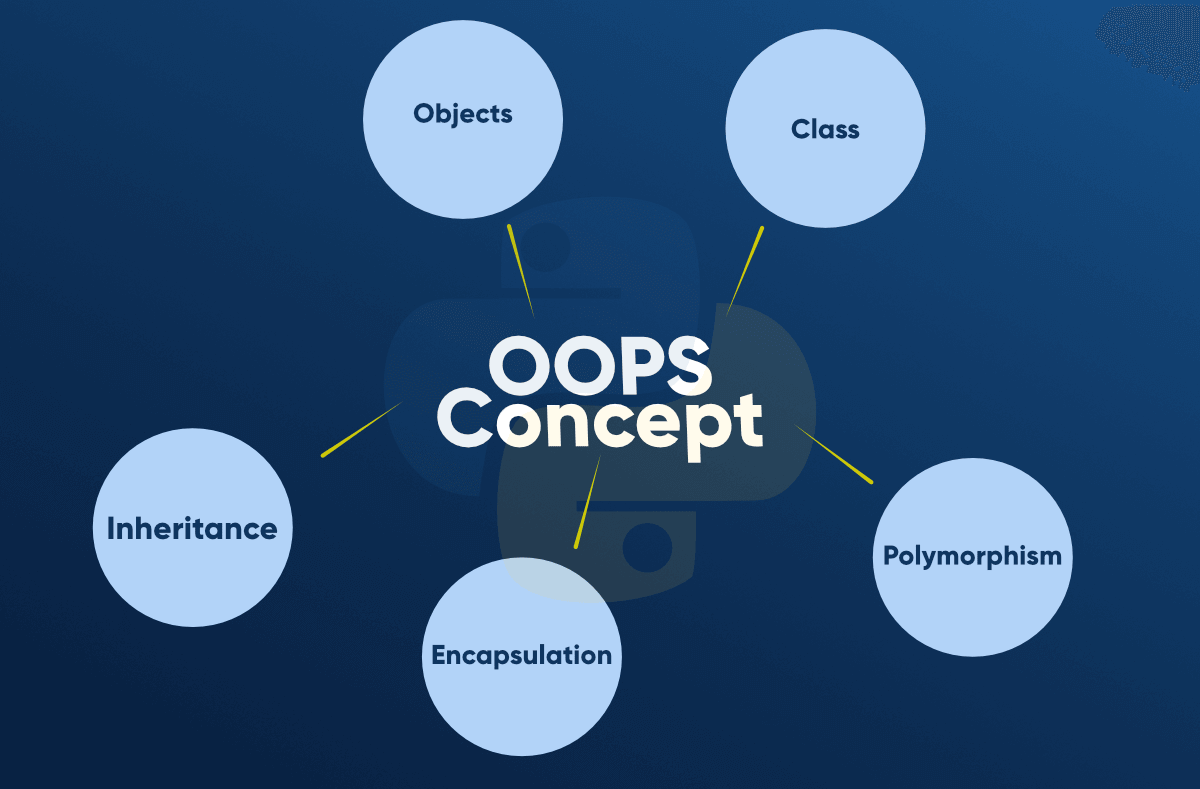
类和对象
类创建一个用户定义的数据结构, 该数据结构拥有自己的数据成员和成员函数, 可以通过创建该类的实例来访问和使用它们。类就像对象的蓝图。
AnObject是类的实例。类就像一个蓝图, 而实例是具有实际值的类的副本。
# Python program to demonstrate
# classes and objects

class Dog:

    # A simple class attribute
    attr1 = "mamal"
    attr2 = "dog"

    # A sample method
    def fun(self):
        print("I'm a", self.attr1)
        print("I'm a", self.attr2)

# Driver code
# Object instantiation
Rodger = Dog()

# Accessing class attributes
# and method through objects
print(Rodger.attr1)
Rodger.fun()
输出如下:
mamal
I'm a mamal
I'm a dog
注意:有关更多信息, 请参阅??Python类和对象.
自己
自表示该类的实例。通过使用”自”关键字, 我们可以在python中访问该类的属性和方法。它将属性与给定参数绑定在一起。
注意:有关更多信息, 请参阅??自己在Python类中.
构造函数和析构函数
构造函数:构造函数通常用于实例化对象。构造函数的任务是在创建类的对象时初始化(分配值)给类的数据成员。在Python中__在里面__()方法被称为构造函数, 并且在创建对象时始终被调用。构造器可以有两种类型:
- 默认构造函数:构造函数称为隐式, 不接受任何参数。
- 参数化的构造函数:用参数显式调用的构造函数称为参数化构造函数。
# Python program to demonstrate
# constructors


class Addition:
    # parameterized constructor
    def __init__(self, f, s):
        self.first = f
        self.second = s

    def calculate(self):
        print(self.first + self.second)

# Invoking parameterized constructor
obj = Addition(1000, 2000)

# perform Addition
obj.calculate()
输出如下:
3000注意:有关更多信息, 请参阅??Python中的构造函数.
析构函数:销毁对象时调用析构函数。的__del __()方法在Python中被称为析构方法。当所有对对象的引用都已删除时, 即当对象被垃圾回收时, 将调用该方法。
# Python program to illustrate destructor
class Employee:

    # Initializing
    def __init__(self):
        print('Employee created.')

    # Deleting (Calling destructor)
    def __del__(self):
        print('Destructor called, Employee deleted.')

obj = Employee()
del obj
输出如下:
Employee created.
Destructor called, Employee deleted.
注意:有关更多信息, 请参阅??Python中的析构函数.
遗产
继承是任何类提取和使用其他类的功能的能力。这是从现有的称为基类的类中创建称为派生类的新类的过程。
# A Python program to demonstrate inheritance


class Person():

    # Constructor
    def __init__(self, name):
        self.name = name

    # To get name
    def getName(self):
        return self.name

    # To check if this person is employee
    def isEmployee(self):
        return False


# Inherited or Sub class (Note Person in bracket)
class Employee(Person):

    # Here we return true
    def isEmployee(self):
        return True

# Driver code
emp = Person("Geek1")  # An Object of Person
print(emp.getName(), emp.isEmployee())

emp = Employee("Geek2") # An Object of Employee
print(emp.getName(), emp.isEmployee())
输出如下:
Geek1 False
Geek2 True
注意:有关更多信息, 请参阅??Python继承.
封装形式
封装形式描述了包装数据的思想以及在一个单元中处理数据的方法。这对直接访问变量和方法施加了限制, 并可以防止意外修改数据。
# Python program to demonstrate
# encapsulation

# Creating a Base class
class Base:
    def __init__(self):
        self.a = "srcmini"
        self.__c = "srcmini"

# Creating a derived class
class Derived(Base):
    def __init__(self):

        # Calling constructor of
        # Base class
        Base.__init__(self)
        print("Calling private member of base class: ")
        print(self.__a)
# Driver code
obj = Derived()
输出如下:
Traceback (most recent call last):
  File "/home/5a605c59b5b88751d2b93dd5f932dbd5.py", line 20, in


    obj = Derived()
  File "/home/5a605c59b5b88751d2b93dd5f932dbd5.py", line 18, in __init__
    print(self.__a)
AttributeError: 'Derived' object has no attribute '_Derived__a'
注意:有关更多信息, 请参阅??用Python封装.
多态性
多态性是指OOP编程语言有效区分具有相同名称的实体的能力。这是通过Python在这些实体的签名的帮助下完成的。
# Python program to demonstrate
# Polymorphism


class A():
    def show(self):
        print("Inside A")

class B():
    def show(self):
        print("Inside B")

# Driver's code
a = A()
a.show()
b = B()
b.show()
输出如下:
Inside A
Inside B
请参阅文章以了解有关OOPS的更多信息:Python中的绑定, 未绑定和静态方法Python中的多重继承__Python中的__new__
文件处理是Python处理文件的功能, 即读取和写入文件以及许多其他文件处理选项。 Python将文件视为文本或二进制文件的方式有所不同, 这很重要。每行代码包含一个字符序列, 它们形成一个文本文件。文件的每一行都以特殊字符结尾, 称为EOL或行尾字符像逗号{, }或换行符。
Python中的基本文件处理操作为:
1)打开一个文件:打开文件是指准备好文件以供读取或写入。可以使用打开()功能。此函数返回一个文件对象, 并接受两个参数, 一个参数接受文件名, 另一个参数接受模式(访问模式)。 Python提供了六种访问模式:
| 存取模式 | 描述 |
|---|---|
| 只读(‘r’) | 打开文本文件以供阅读。句柄位于文件的开头。 |
| 读写(” r +”) | 打开文件进行读写。句柄位于文件的开头。 |
| 只写(” w”) | 打开文件进行写入。对于现有文件, 数据将被截断并被覆盖。句柄位于文件的开头。 |
| 写和读(w +) | 打开文件进行读写。对于现有文件, 数据将被截断并覆盖。句柄位于文件的开头。 |
| 仅附加(‘a’) | 打开文件进行写入。句柄位于文件的末尾。 |
| 追加并阅读(‘a +’) | 打开文件进行读写。句柄位于文件的末尾。 |
# Open function to open the file "MyFile1.txt"
# (same directory) in read mode and
file1 = open("MyFile.txt", "r")

# store its reference in the variable file1
# and "MyFile2.txt" in D:\Text in file2
file2 = open(r"D:\Text\MyFile2.txt", "r+")
注意:有关更多信息, 请参阅??用Python打开文件.
2)关闭文件: 关()函数关闭文件并释放该文件获取的内存空间。
# Opening and Closing a file "MyFile.txt"
# for object name file1.
file1 = open("MyFile.txt", "a")
file1.close()
3)从文件读取:有三种从文本文件读取数据的方法。
- 读():以字符串形式返回读取的字节。读取n个字节, 如果未指定n, 则读取整个文件。
File_object.read([n])
- readline():读取文件的一行并以字符串形式返回。对于指定的n, 最多读取n个字节。但是, 即使n超出了行的长度, 也不会读取多于一行。
File_object.readline([n])
- readlines():读取所有行, 并将它们作为列表中的字符串元素作为每行返回。
File_object.readlines()
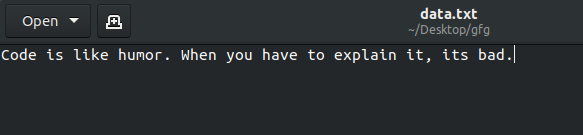
假设文件如下所示:
# Program to show various ways to
# read data from a file.

file1 = open("data.txt", "r+")

print("Output of Read function is ")
print(file1.read())
print()

# seek(n) takes the file handle to the nth
# bite from the beginning.
file1.seek(0)

print("Output of Readline function is ")
print(file1.readline())
print()

file1.seek(0)

# readlines function
print("Output of Readlines function is ")
print(file1.readlines())
print()
file1.close()
输出如下:
Output of Read function is
Code is like humor. When you have to explain it, its bad.

Output of Readline function is
Code is like humor. When you have to explain it, its bad.

Output of Readlines function is
['Code is like humor. When you have to explain it, its bad.']
注意:有关更多信息, 请参阅??如何在Python中读取文件.
4)写入文件:有两种写入文件的方法。
- 写():将字符串str1插入文本文件的一行中。
File_object.write(str1)
- writelines():对于字符串元素列表, 每个字符串都插入到文本文件中。用于一次插入多个字符串。
File_object.writelines(L) for L = [str1, str2, str3]
# Python program to demonstrate
# writing to file

# Opening a file
file1 = open('myfile.txt', 'w')
L = ["This is Delhi \n", "This is Paris \n", "This is London \n"]
s = "Hello\n"

# Writing a string to file
file1.write(s)

# Writing multiple strings
# at a time
file1.writelines(L)

# Closing file
file1.close()
输出如下:
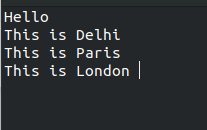
注意:有关更多信息, 请参阅??用Python写入文件.
请参阅以下文章, 以了解有关文件处理的更多信息:Python seek()函数Python tell()函数Python中的OS模块OS模块上的程序
模组
模块是一个包含Python语句和定义的自包含Python文件, 例如名为GFG.py, 可以将其视为名为玻璃纤维可以借助导入进口声明.
让我们创建一个名为GFG的简单模块。
# Python program to demonstrate
# modules


# Defining a function
def Geeks():
    print("srcmini")

# Defining a variable
location = "Noida"

# Defining a class
class Employee():

    def __init__(self, name, position):
        self. name = name
        self.position = position

    def show(self):
        print("Employee name:", self.name)
        print("Employee position:", self.position)
要使用上面创建的模块, 请在同一目录中创建一个新的Python文件, 然后使用import声明。
# Python program to demonstrate
# modules


import GFG

# Use the function created
GFG.Geeks()

# Print the variable declared
print(GFG.location)

# Use the class created
emp = GFG.Employee("Nikhil", "Developer")
emp.show()
输出如下:
srcmini
Noida
Employee name: Nikhil
Employee position: Developer
注意:有关更多信息, 请参阅??Python模块.
配套
包是一种结构化许多包和模块的方法, 有助于组织数据集的层次结构, 使目录和模块易于访问。
要使用Python创建一个包, 我们需要遵循以下三个简单步骤:
- 首先, 我们创建一个目录并给它一个程序包名称, 最好与它的操作有关。
- 然后, 我们将类和所需的函数放入其中。
- 最后, 我们创建一个__init__.py文件放在目录中, 以让Python知道该目录是一个包。
例子:让我们创建一个汽车包装。
首先, 我们创建一个目录并将其命名为Cars。
然后, 我们需要创建模块。我们将创建2个模块-BMW和AUDI。
对于Bmw.py
# Python code to illustrate the Modules
class Bmw:

    def __init__(self):
        self.models = ['i8', 'x1', 'x5', 'x6']

    def outModels(self):
        print('These are the available models for BMW')
        for model in self.models:
            print('\t % s ' % model)
对于Audi.py
# Python code to illustrate the Module
class Audi:

    def __init__(self):
        self.models = ['q7', 'a6', 'a8', 'a3']

    def outModels(self):
        print('These are the available models for Audi')
        for model in self.models:
            print('\t % s ' % model)
最后, 我们创建__init__.py文件。该文件将放置在Cars目录中, 并且可以保留为空白。
现在, 让我们使用我们创建的包。为此, 请在Cars软件包所在的目录中创建一个sample.py文件, 并在其中添加以下代码:
# Import classes from your brand new package
from Cars import Bmw
from Cars import Audi

# Create an object of Bmw class & call its method
ModBMW = Bmw()
ModBMW.outModels()

# Create an object of Audi class & call its method
ModAudi = Audi()
ModAudi.outModels()
输出如下:
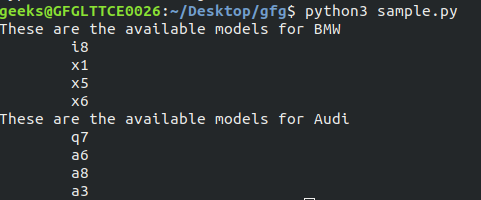
注意:有关更多信息, 请参阅??创建和访问Python包.
模块正则表达式(RE)指定与之匹配的一组字符串(模式)。为了理解RE的类比, MetaCharacters非常有用, 重要, 并将在模块功能中使用re。共有14个元字符:
\   Used to drop the special meaning of character
    following it (discussed below)
[]  Represent a character class
^   Matches the beginning
$   Matches the end
.   Matches any character except newline
?   Matches zero or one occurrence.
|   Means OR (Matches with any of the characters
    separated by it.
*   Any number of occurrences (including 0 occurrences)
+   One ore more occurrences
{}  Indicate the number of occurrences of a preceding RE
    to match.
()  Enclose a group of REs
最常用的方法是:
re.findall():
以字符串列表形式返回字符串中所有不重复的模式匹配项。从左到右扫描字符串, 并以找到的顺序返回匹配项。
# A Python program to demonstrate working of
# findall()
import re


string = """Hello my Number is 123456789 and
             my friend's number is 987654321"""

# A sample regular expression to find digits.
regex = '\d+'

match = re.findall(regex, string)
print(match)
输出如下:
['123456789', '987654321']在上面的示例中, 元字符黑斜线‘\’具有重要作用, 因为它发出各种序列的信号。如果要使用没有特殊含义的黑斜杠作为元字符, 请使用‘\\’.
\d   Matches any decimal digit, this is equivalent
     to the set class [0-9].
\D   Matches any non-digit character.
\s   Matches any whitespace character.
\S   Matches any non-whitespace character
\w   Matches any alphanumeric character, this is
     equivalent to the class [a-zA-Z0-9_].
\W   Matches any non-alphanumeric character.
re.compile():
正则表达式被编译成模式对象, 该对象具有用于各种操作的方法, 例如搜索模式匹配或执行字符串替换。
# A Python program to demonstrate working of
# compile()
import re

# it is equivalent to [abcde].
p = re.compile('[a-e]')

print(p.findall("Aye, said Mr. Gibenson Stark"))
输出如下:
['e', 'a', 'd', 'b', 'e', 'a']re.match():
此函数尝试将模式匹配到整个字符串。 re.match函数成功返回匹配对象, 失败则返回None。
# A Python program to demonstrate working
# of re.match().
import re


def findMonthAndDate(string):

    regex = r"([a-zA-Z]+) (\d+)"
    match = re.match(regex, string)

    if match == None:
        print("Not a valid date")
        return

    print("Given Data: % s" % (match.group()))
    print("Month: % s" % (match.group(1)))
    print("Day: % s" % (match.group(2)))


# Driver Code
findMonthAndDate("Jun 24")
print("")
findMonthAndDate("I was born on June 24")
输出如下:
Given Data: Jun 24
Month: Jun
Day: 24

Not a valid date
研究():
此方法返回None(如果模式不匹配), 或者返回re.MatchObject, 其中包含有关字符串匹配部分的信息。
# A Python program to demonstrate working of re.match().
import re

regex = r"([a-zA-Z]+) (\d+)"

match = re.search(regex, "I was born on June 24")

if match != None:

    print("Match at index % s, % s" % (match.start(), match.end()))

    # this will print "June 24"
    print("Full match: % s" % (match.group(0)))

    # this will print "June"
    print("Month: % s" % (match.group(1)))

    # this will print "24"
    print("Day: % s" % (match.group(2)))

else:
    print("The regex pattern does not match.")
输出如下:
Match at index 14, 21
Full match: June 24
Month: June
Day: 24
注意:有关更多信息, 请参阅??Python中的正则表达式.
与其他语言一样, Python还通过以下方式提供运行时错误:异常处理借助的方法尝试除外.
try-except如何工作?
- 执行第一个try子句, 即try和except子句之间的代码。
- 如果没有异常, 则只有try子句将运行, 除非子句已完成。
- 如果发生任何异常, try子句将被跳过, except子句将运行。
- 如果发生任何异常, 但代码中的except子句无法处理该异常, 则会将其传递给外部try语句。如果未处理异常, 则执行停止。
- 一个try语句可以有一个以上的except子句。
代码1:也不例外, 因此try子句将运行。
# Python code to illustrate
# working of try()
def divide(x, y):
    try:
        result = x //y
        print("Yeah ! Your answer is :", result)
    except ZeroDivisionError:
        print("Sorry ! You are dividing by zero ")

# Look at parameters and note the working of Program
divide(3, 2)
输出如下:
Yeah ! Your answer is : 1代码2:有一个例外, 因此只有except子句会运行。
# Python code to illustrate
# working of try()
def divide(x, y):
    try:
        result = x //y
        print("Yeah ! Your answer is :", result)
    except:
        print("Sorry ! You are dividing by zero ")

# Look at parameters and note the working of Program
divide(3, 0)
输出如下:
Sorry ! You are dividing by zero其他条款:在python中, 你还可以在try-except块上使用else子句, 该子句必须出现在所有except子句之后。仅当try子句未引发异常时, 代码才进入else块。
# Python code to illustrate
# working of try()
def divide(x, y):
    try:
        result = x //y
        print("Yeah ! Your answer is :", result)
    except:
        print("Sorry ! You are dividing by zero ")
    else:
        print("No exception raised")

# Look at parameters and note the working of Program
divide(3, 2)
输出如下:
Yeah ! Your answer is : 1
No exception raised
引发异常:引发语句使程序员可以强制发生特定的异常。这必须是异常实例或异常类。要了解有关异常类列表的更多信息点击这里.
# Program to depict Raising Exception

try:
    raise NameError("Hi there")  # Raise Error
except NameError:
    print("An exception")
    raise  # To determine whether the exception was raised or not
输出如下:
Traceback (most recent call last):
  File "/home/4678cd3d633b2ddf9d19fde6283f987b.py", line 4, in


    raise NameError("Hi there")  # Raise Error
NameError: Hi there
注意:有关更多信息, 请参阅??Python异常处理.
注意怪胎!巩固你的基础Python编程基础课程和学习基础知识。
首先, 你的面试准备可通过以下方式增强你的数据结构概念:Python DS课程。
评论前必须登录!
注册