 srcmini
基本上, 向图像添加水印所需要做的就是从图像对象获取CompositeImage方法。这种方法使你可以轻松地将一个图像合成到另一个图像上。
<?php

// Create instance of the original image
$image = new Imagick();
$image->readImage("image.jpg");

// Create instance of the Watermark image
$watermark = new Imagick();
$watermark->readImage("watermark.png");

// The start coordinates where the file should be printed
$x = 0;
$y = 0;

// Draw watermark on the image file with the given coordinates
$image->compositeImage($watermark, Imagick::COMPOSITE_OVER, $x, $y);

// Save image
$image->writeImage("image_watermark." . $image->getImageFormat());
该方法中给出的坐标完全取决于你, 因为你对水印的希望可能有所不同(在整个图像上或仅在图像的一角)。水印文件应具有明显的透明性, 格式为.png, 否则水印将清楚地覆盖你的原始图像。
例子
在以下示例中, 我们将显示有关如何使用以下水印向图像添加水印的示例(水印也可以是Our Code World的徽标):

对于图像, 我们将使用没有版权的快乐山羊:
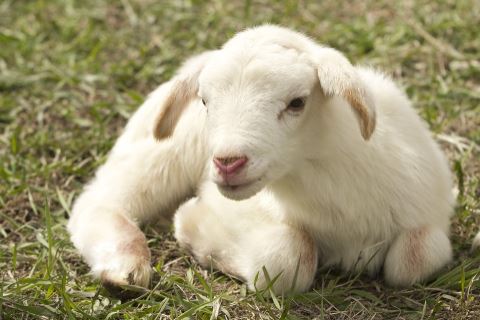
不错不是吗?
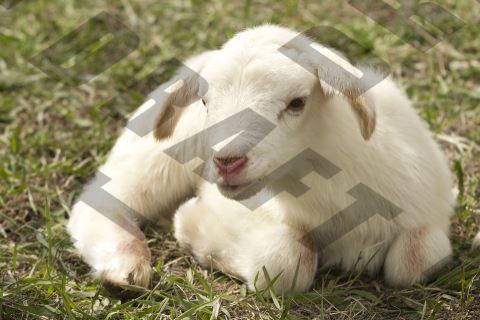
全尺寸水印
注意
我们使用PHP的getcwd函数为Imagick提供绝对路径(检索当前工作目录), 因为它通常不适用于../file.png之类的相对路径。根据你的工作方式(使用框架或纯PHP), 提供文件绝对路径的方式可能会有所不同, 因此请多加注意!
<?php

// Open the image to draw a watermark
$image = new Imagick();
$image->readImage(getcwd(). "/goat.jpg");

// Open the watermark image
// Important: the image should be obviously transparent with .png format
$watermark = new Imagick();
$watermark->readImage(getcwd(). "/draft_watermark.png");

// Retrieve size of the Images to verify how to print the watermark on the image
$img_Width = $image->getImageWidth();
$img_Height = $image->getImageHeight();
$watermark_Width = $watermark->getImageWidth();
$watermark_Height = $watermark->getImageHeight();

// Check if the dimensions of the image are less than the dimensions of the watermark
// In case it is, then proceed to
if ($img_Height < $watermark_Height || $img_Width < $watermark_Width) {
    // Resize the watermark to be of the same size of the image
    $watermark->scaleImage($img_Width, $img_Height);

    // Update size of the watermark
    $watermark_Width = $watermark->getImageWidth();
    $watermark_Height = $watermark->getImageHeight();
}

// Calculate the position
$x = ($img_Width - $watermark_Width) / 2;
$y = ($img_Height - $watermark_Height) / 2;

// Draw the watermark on your image
$image->compositeImage($watermark, Imagick::COMPOSITE_OVER, $x, $y);


// From now on depends on you what you want to do with the image
// for example save it in some directory etc.
// In this example we'll Send the img data to the browser as response
// with Plain PHP
header("Content-Type: image/" . $image->getImageFormat());
echo $image;

// Or if you prefer to save the image on some directory
// Take care of the extension and the path !
// $image->writeImage(getcwd(). "/goat_watermark." . $image->getImageFormat());
它将与我们的图像一起在浏览器中产生以下输出(或者如果你决定将其保存到文件中):
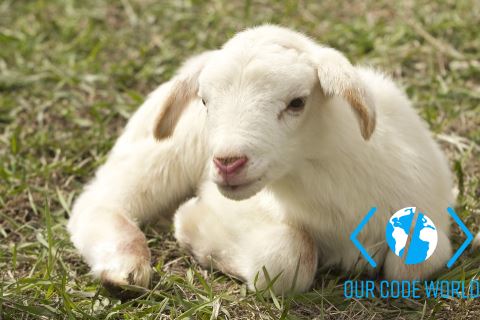
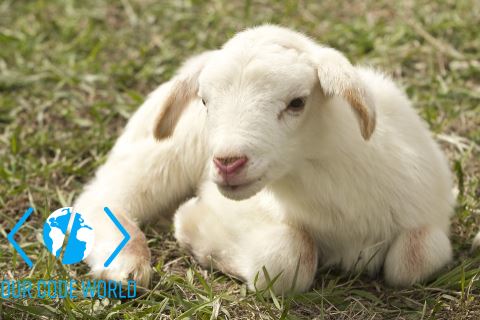
右下角水印
<?php

// Open the image to draw a watermark
$image = new Imagick();
$image->readImage(getcwd(). "/goat.jpg");

// Open the watermark image
// Important: the image should be obviously transparent with .png format
$watermark = new Imagick();
$watermark->readImage(getcwd(). "/watermark_file.png");

// The resize factor can depend on the size of your watermark, so heads up with dynamic size watermarks !
$watermarkResizeFactor = 6;

// Retrieve size of the Images to verify how to print the watermark on the image
$img_Width = $image->getImageWidth();
$img_Height = $image->getImageHeight();
$watermark_Width = $watermark->getImageWidth();
$watermark_Height = $watermark->getImageHeight();

// Resize the watermark with the resize factor value
$watermark->scaleImage($watermark_Width / $watermarkResizeFactor, $watermark_Height / $watermarkResizeFactor);

// Update watermark dimensions
$watermark_Width = $watermark->getImageWidth();
$watermark_Height = $watermark->getImageHeight();

// Draw on the bottom right corner of the original image
$x = ($img_Width - $watermark_Width);
$y = ($img_Height - $watermark_Height);

// Draw the watermark on your image
$image->compositeImage($watermark, Imagick::COMPOSITE_OVER, $x, $y);

// From now on depends on you what you want to do with the image
// for example save it in some directory etc.
// In this example we'll Send the img data to the browser as response
// with Plain PHP
header("Content-Type: image/" . $image->getImageFormat());
echo $image;

// Or if you prefer to save the image on some directory
// Take care of the extension and the path !
// $image->writeImage(getcwd(). "/goat_watermark." . $image->getImageFormat());
其中应产生以下图像:
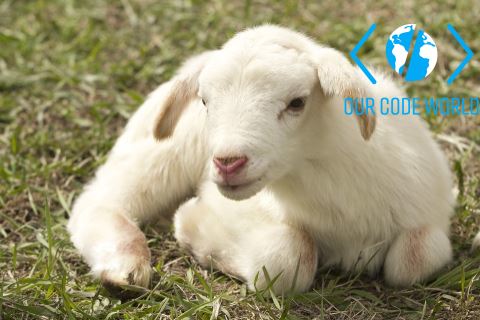
右上角水印
<?php

// Open the image to draw a watermark
$image = new Imagick();
$image->readImage(getcwd(). "/goat.jpg");

// Open the watermark image
// Important: the image should be obviously transparent with .png format
$watermark = new Imagick();
$watermark->readImage(getcwd(). "/watermark_file.png");

// The resize factor can depend on the size of your watermark, so heads up with dynamic size watermarks !
$watermarkResizeFactor = 6;

// Retrieve size of the Images to verify how to print the watermark on the image
$img_Width = $image->getImageWidth();
$img_Height = $image->getImageHeight();
$watermark_Width = $watermark->getImageWidth();
$watermark_Height = $watermark->getImageHeight();

// Resize the watermark with the resize factor value
$watermark->scaleImage($watermark_Width / $watermarkResizeFactor, $watermark_Height / $watermarkResizeFactor);

// Update watermark dimensions
$watermark_Width = $watermark->getImageWidth();
$watermark_Height = $watermark->getImageHeight();

// Draw on the top right corner of the original image
$x = ($img_Width - $watermark_Width);
$y = 0;

// Draw the watermark on your image
$image->compositeImage($watermark, Imagick::COMPOSITE_OVER, $x, $y);

// From now on depends on you what you want to do with the image
// for example save it in some directory etc.
// In this example we'll Send the img data to the browser as response
// with Plain PHP
header("Content-Type: image/" . $image->getImageFormat());
echo $image;

// Or if you prefer to save the image on some directory
// Take care of the extension and the path !
// $image->writeImage(getcwd(). "/goat_watermark." . $image->getImageFormat());
其中应产生以下图像:
左下角水印
<?php

// Open the image to draw a watermark
$image = new Imagick();
$image->readImage(getcwd(). "/goat.jpg");

// Open the watermark image
// Important: the image should be obviously transparent with .png format
$watermark = new Imagick();
$watermark->readImage(getcwd(). "/watermark_file.png");

// The resize factor can depend on the size of your watermark, so heads up with dynamic size watermarks !
$watermarkResizeFactor = 6;

// Retrieve size of the Images to verify how to print the watermark on the image
$img_Width = $image->getImageWidth();
$img_Height = $image->getImageHeight();
$watermark_Width = $watermark->getImageWidth();
$watermark_Height = $watermark->getImageHeight();

// Resize the watermark with the resize factor value
$watermark->scaleImage($watermark_Width / $watermarkResizeFactor, $watermark_Height / $watermarkResizeFactor);

// Update watermark dimensions
$watermark_Width = $watermark->getImageWidth();
$watermark_Height = $watermark->getImageHeight();

// Draw on the bottom left corner of the original image
$x = 0;
$y = ($img_Height - $watermark_Height);

// Draw the watermark on your image
$image->compositeImage($watermark, Imagick::COMPOSITE_OVER, $x, $y);

// From now on depends on you what you want to do with the image
// for example save it in some directory etc.
// In this example we'll Send the img data to the browser as response
// with Plain PHP
header("Content-Type: image/" . $image->getImageFormat());
echo $image;

// Or if you prefer to save the image on some directory
// Take care of the extension and the path !
// $image->writeImage(getcwd(). "/goat_watermark." . $image->getImageFormat());
其中应产生以下图像:
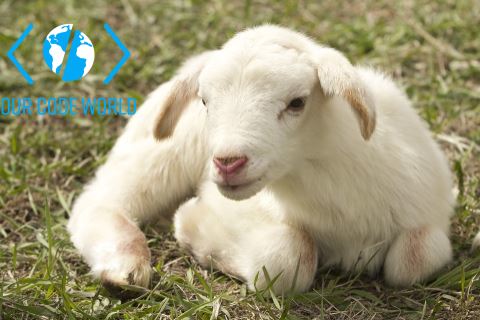
左上角水印
<?php

// Open the image to draw a watermark
$image = new Imagick();
$image->readImage(getcwd(). "/goat.jpg");

// Open the watermark image
// Important: the image should be obviously transparent with .png format
$watermark = new Imagick();
$watermark->readImage(getcwd(). "/watermark_file.png");

// The resize factor can depend on the size of your watermark, so heads up with dynamic size watermarks !
$watermarkResizeFactor = 6;

// Retrieve size of the Images to verify how to print the watermark on the image
$img_Width = $image->getImageWidth();
$img_Height = $image->getImageHeight();
$watermark_Width = $watermark->getImageWidth();
$watermark_Height = $watermark->getImageHeight();

// Resize the watermark with the resize factor value
$watermark->scaleImage($watermark_Width / $watermarkResizeFactor, $watermark_Height / $watermarkResizeFactor);

// Update watermark dimensions
$watermark_Width = $watermark->getImageWidth();
$watermark_Height = $watermark->getImageHeight();

// Draw the watermark on your image (top left corner)
$image->compositeImage($watermark, Imagick::COMPOSITE_OVER, 0, 0);

// From now on depends on you what you want to do with the image
// for example save it in some directory etc.
// In this example we'll Send the img data to the browser as response
// with Plain PHP
header("Content-Type: image/" . $image->getImageFormat());
echo $image;

// Or if you prefer to save the image on some directory
// Take care of the extension and the path !
// $image->writeImage(getcwd(). "/goat_watermark." . $image->getImageFormat());
其中应产生以下图像:
编码愉快!
评论前必须登录!
注册